SwiftUI, UIViewRepresentable, and attributed text
The difficulty of handling attributed text with SwiftUI 1.0
While SwiftUI offers great support for many aspects of a modern iOS app out of the box, there's one particular UI technology that was conspicuously missing in SwiftUI 1.0. Attributed Strings. If you want to have parts of the text in your interface bold, colored, italic, and so on, then there's no good SwiftUI way of doing this. The Text type in SwiftUI only supports strings, not the rich text equivalent NSAttributedString. This means that to support rich text, you'd have to find a non-SwiftUI solution. Since text attributes are one of the staples of Markdown, and since Hyperdeck uses Markdown, I needed good attributed text support in Hyperdeck. This article will explain how Hyperdeck uses UIViewRepresentable to render attributed text, and what kind of performance issues I ran by doing so. I'll also briefly show some other possible solutions.
Solution Space
Before we talk about the solution that I ultimately chose - UIViewRepresentable, I'll briefly mention the other solutions that could be applied to solve this problem.
Combine Text Elements
You can have something which looks like attributed text by combining multiple text elements in a HStack:
HStack {
Text()
Text().fontWeight(.bold)
Text().foregroundColor(.blue)
}
While this works, it is very limited. For starters, this doesn't work if you need multiline text. This also doesn't work well for right-to-left languages.
Render Text into Images
Another option would be to use Core Text to render text into images which you could then cache and display in a SwiftUI Image element. This has the downsides that you'd need to implement proper text layout code, understand Core Text, and make sure your cache invalidation system works reliably. It is certainly possible but a lot of work.
Use UILabel with UIViewRepresentable
This is the solution that I chose to display attributed text. It is also what you will find when you search for this problem. It works reasonably well, but has a custom of tricky side effects which I will explain in this blog post.
Basics
The absolute basic usage of UIViewRepresentable is straightforward. It takes a UIView and makes it available in SwiftUI as a View. To achieve that, the UIViewRepresentable protocol offers two methods which you have to implement:
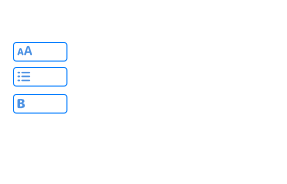
makeUIView(context: Context) -> UIViewType: Create a newUIViewof the typeUIViewTypeupdateUIView(_ view: UIViewType, context: Context): Whenever the properties of yourUIViewRepresentablechange, SwiftUI calls this to allow you to modify yourUIViewTypebased on the changes.
This sounds more complicated than it is. So here is our first example: A UILabel in SwiftUI:
struct AttributedText: UIViewRepresentable {
var text: NSAttributedString
}
We have a struct called AttributedText which is our new SwiftUI Attributed Text Type. It only has one property a NSAttributedString text. In makeUIView we're creating our label, and in updateUIView we're assigning the text to the label whenever text changes. SwiftUI cares about the changing of the text for us. Next, lets have a look at how we're using this:
struct Example: View {
let attributedString: NSAttributedString
var body: some View {
VStack {
Text()
AttributedText(text: attributedString)
}
}
}
As you can see, you can use this very much like a normal SwiftUI view. So... awesome we're done? Not quite.
The Problem with the Height

When you run this, you'll see that very long text doesn't break. Everything renders in one line. The problem is that the SwiftUI layout system is fundamentally different from the UIKit one.
In UIKit your views are sized via constraints or frames. This means they are given a size in which they're rendering themselves. If a multiline label has a CGRect frame of 300pt but the text is longer it will perform a linke break. Explaining the SwiftUI layout system would go beyond the scope of this article, but Javier has multiple fantastic articles on this topic. In short, a UIView in SwiftUI greedily takes all the space that it requires. If a label requires 5000pt for text, that's what SwiftUI will allow it to use.
In order to solve this, we have to assign the UIView the maximum size that it is allowed to use. In the best scenario that would be the width of the phone. But you might have paddings, margins, or additional elements on the left or right side. To solve this, SwiftUI has a construct called GeometryReader
This View will read the size of the current view and allow you to access it within a closure. Here's a minimal example:
struct Example: View {
var title: String
var body: some View {
HStack {
Text(title)
GeometryReader { proxy in
Text()
}
}
}
}
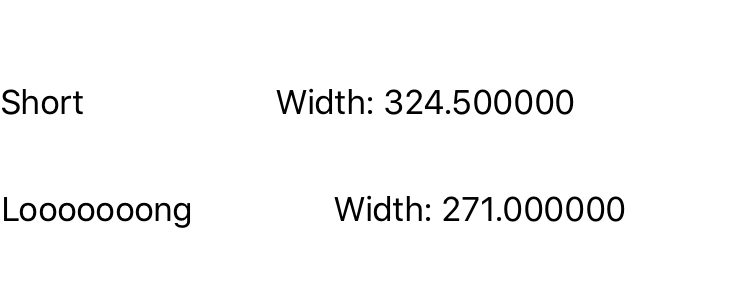
In the following image, I'm using the Example view twice so you can see how it reports different width values depending on how much space Text(title) takes up:
Armed with this GeometryReader we can solve our UILabel issue because we can specifically tell our label how much space is available. First, we'll adapt our AttributedText struct:
struct AttributedText: UIViewRepresentable {
var width: CGFloat
var text: NSAttributedString
}
In order to use it, we need the width that the GeometryReader offers:
struct Example: View {
var attributedText: NSAttributedText
var body: some View {
HStack {
Text()
GeometryReader { proxy in
AttributedText(width: proxy.size.width, text: attributedText)
}
}
}
}
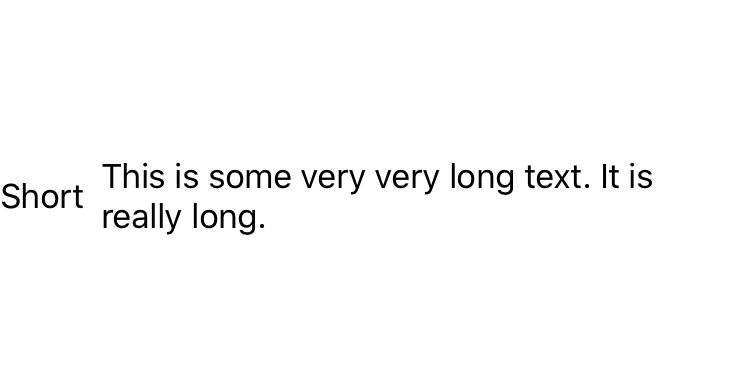
This works great! You can see it in the following screenshot. The UILabel respects the available size from within SwiftUI's layout system and breaks lines properly.
Typing Performance Issues
So, for most apps this probably works great. However, Hyperdeck has a curious problem. Whenever you type an additional character into a slide, the whole slide is marked as outdated and will be re-rendered. This causes SwiftUI to build up the view tree again. There're ways to compensate that by using EquatableView but when doing that I had issue where changing the contents of a slide would not always update the SwiftUI representation correctly. When building up the view tree, it also disposes the old UILabels and adds new ones again. For slides with many attributed elements, this would lead to a slight delay when rendering a slide. That in itself is not a problem, but it adds up when the device is an older iPad and when the user is typing really fast (each keystroke causes a re-render). For this reason, Hyperdeck employs a per-slide cache of UILabel elements so that they don't need to be allocated again:
struct AttributedText: UIViewRepresentable {
var id: String
var width: CGFloat
var text: NSAttributedString
var cache: [String: UILabel]
let label = UILabel()
label.numberOfLines = 0
label.lineBreakMode = .byWordWrapping
cache[id] = label
return label
}
}
This might not necessarily be needed by all apps, but for Hyperdeck it allowed reaching the goal of having a fluent typing experience even on older iPads.
Scrolling Performance Issues
If you look at the Hyperdeck tech stack you'll notice that the slide preview is a UICollectionView even though the slides are SwiftUI. I took this approach because collection views are not yet available for SwiftUI and the current UICollectionView offers great performance and flexibility. However, if you've tried the current Hyperdeck beta) you'll have noticed that the scrolling performance of the slide preview is not particularly good. My first concern when writing the app was a great typing experience, and I decided to forgo an investigation into the terrible scrolling performance until after the first or second beta. I've since had some time to look into this topic and to my surprise this drop in performance is 100% caused by the wrapping of UILabel in SwiftUI. When I run Instruments and scroll a lot, 70% - 80% of the samples cycles is spend layouting UILabels and calculating string sizes.
DrawingGroup
SwiftUI has a beautiful rendering optimization where it will take your View hierachy and render it as a texture on your GPU in order to have a highly optimized drawing path. You can enable this with a call to .drawingGroup:
var body: some View {
    HStack {
        // existing code…
    }
    .drawingGroup()
}
However, when I do that on my Hyperdeck slides, I'm getting this result:

What's happening here is that SwiftUI can't render the contents of a UILabel to a GPU texture, so you just get these fancy yellow rectangles with a red stop sign icon. Nice. Obviously, there's also no way to hook into this drawingGroup system. You can't extend UILabel to provide a rasterized version of its contents to SwiftUI. So this also doesn't work.
As mentioned earlier, UILabels are required for attributed text, and to investigate I disabled attributed text and ran Hyperdeck with the native SwiftUI Text element instead of a wrapped UILabel. The result was butter-smooth scrolling performance. This lead me to my current solution.
Current Solution
As explained above, adding UILabel via UIViewRepresentable to SwiftUI Views considerably slows down scrolling speed in a UICollectionView. I do have to support attributed text though, so I can't just use the SwiftUI Text element. Also, drawingGroup improves the performance but it also is not compatible with UILabel.
The solution to this problem, for Hyperdeck, was the observation that not every paragraph, every headline, every list item on a slide has attributed elements. Many are just plain text without bold or italic attributes. Since Hyperdeck knows the composition of each slide up front, it can render each element (headline, list item, paragraph, etc) as either a Text or a AttributedText based on what's required. Even more, if a slide does not contain any AttributedText elements, the whole slide can be rendered on the GPU via drawingGroup. This works reasonably well. In my current version (that wasn't released yet) I'm getting a much improved scrolling performance. However, this is dependent upon the amount of attributed elements on slides.
Next Steps
I'm very confident that we will see proper attributed text support at WWDC 2020 with SwiftUI 2.0 and that it will be as fast as the current Text element. This will allow me to provide much faster scrolling to anybody already running iOS 14 (soonish). Of course, I also expect a pure Swift alternative to attributed strings that are not backed by a dictionary anymore but rather, for example, by an array of RangeSet and enum tuples with a nice builder pattern to start. Maybe I'll not even need the UICollectionView anymore due to a native SwiftUI collection view. I'm excited. But also, I'm happy that I was able to solve this problem within the constraints of SwiftUI 1.0 in a way that is good enough to ship (hopefully).
| Similar Articles |
|---|
